To Churn or not to Churn? Learn about the differences between churn and no-churn ice cream-making methods. Find out which technique suits your kitchen, equipment, and taste preferences best!
When it comes to making ice cream at home, the number of methods available can feel a bit overwhelming.
Should you invest in a machine, stick to a simple no-churn recipe, or try one of the creative alternatives, like making it in a bag?
Each method has its own benefits and challenges, and figuring out which one is best for you depends on factors like your available time, equipment, and the type of texture you prefer.
This guide will take you through the different methods of making ice cream and help you decide which one suits your needs and kitchen setup the best.
We’ll also link you to more detailed articles on each method, so you can find out more once you’ve made your choice of which method works best for you.

Ice Cream-Making Methods
Ice cream making can be a wonderful experience, and there are several methods to choose from. Each technique offers unique benefits and challenges, making it important to find the one that suits your preferences.
There are a handful of different approaches you could take, we’ll list a few as follows;
Churned Ice Cream (Using an Ice Cream Machine)
I’ll never forget the first time I used an ice cream machine. The anticipation as the mixture churned and the look of pure excitement on my kid’s faces, when they tasted the creamy result, made every second worth it.
 This is the traditional method most people think of when they imagine making ice cream at home. A churner continuously mixes the ice cream base while it freezes, incorporating air and preventing ice crystals from forming. The result is a smooth, creamy texture.
While this method requires a machine, it’s perfect for those who want a consistent, high-quality result with minimal manual effort. If you’re serious about making ice cream regularly, investing in a machine might be worth it.
Check out our article – Which is the best Ice Cream Maker – a detailed review, which will provide you with some key tips to consider before you commit to making that purchase***
How it works:
- Prepare an ice cream base (usually with cream, sugar, and flavourings).
- Pour the base into the pre-chilled machine, which churns and freezes it simultaneously.
- Ready in 20-40 minutes, depending on the machine.
Pros:
- Produces smooth, creamy texture
- Consistent results
- Minimal manual effort once the machine is running
Cons:
- Requires investment in an ice cream maker
- Takes up storage space
- Preparation time for pre-freezing the bowl (for some models)
Estimated Preparation Time:
- Prep time: 20-30 minutes
- Churn time: 20-40 minutes
- Freezing time: 2-4 hours for firmer consistency
No-Churn Ice Cream
During a summer heatwave, with no ice cream maker in sight, I discovered the magic of no-churn ice cream. The simplicity of the method and the rich, creamy outcome made it an instant family favourite.
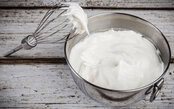 No-churn ice cream is a very popular alternative for those who don’t have an ice cream machine but still want to make a creamy dessert. It typically involves just a few ingredients (such as condensed milk and whipped cream) and requires no special equipment. The base is mixed, and then frozen directly in a container. No-churn ice cream tends to be slightly denser than churned ice cream but still has a satisfying, creamy texture.
How it works:
- Mix condensed milk and whipped cream along with any flavourings.
- Pour into a freezer-safe container and freeze for 4-6 hours or until set.
Pros:
- No special equipment needed
- Simple ingredients and process
- Can be made quickly
Cons:
- Denser texture than churned ice cream
- Limited flavour options compared to churned methods
- May contain more sugar due to the condensed milk base
Estimated Preparation Time:
- Prep time: 15-20 minutes
- Freezing time: 4-6 hours
Ice Cream in a Bag (Also Ice Cream in a Ball)
Making ice cream in a bag has become a go-to activity for my family and friends. The laughter as we take turns shaking the bag, and the satisfaction of enjoying our homemade ice cream in a bag, create unforgettable memories.
 This method is both fun and highly interactive, often popular with kids. You don’t need a machine or any special ingredients — just some basic equipment like resealable bags and ice. It’s a quick and easy way to make a single serving, but the result may not be as creamy as churned or no-churn ice cream.
How it works:
- Place an ice cream base in a small resealable bag.
- Put that bag inside a larger bag filled with ice and salt.
- Shake vigorously for 5-10 minutes until the mixture turns into ice cream.
Pros:
- Fun and interactive, great for kids
- Quick results
- No special equipment required
Cons:
- Makes small portions
- Texture may not be as smooth as other methods
- Can be messy
Estimated Preparation Time:
- Prep time: 5-10 minutes
- Shaking time: 5-10 minutes
- Additional freezing (optional): 1-2 hours for firmer consistency
Frozen Yoghurt (No Machine Required)
 Frozen yoghurt is a lighter, tangy alternative to traditional ice cream and can often be made without a machine. Simply mix together yoghurt, sweeteners, and flavourings, and freeze the mixture in a container.
Like no-churn ice cream, frozen yoghurt can be made with minimal equipment but will need to be stirred occasionally as it freezes to prevent large ice crystals from forming.
How it works:
- Combine yoghurt (Greek or regular), sweeteners, and any flavourings.
- Freeze in a container, stirring every 30-60 minutes for a smoother texture.
Pros:
- Healthier alternative to traditional ice cream
- Can be made without special equipment
- Tangy, refreshing flavour
Cons:
- Requires frequent stirring during freezing
- May form ice crystals if not stirred properly
- Different texture from traditional ice cream
Estimated Preparation Time:
- Prep time: 10-15 minutes
- Freezing time: 4-6 hours (with stirring every 30-60 minutes)
Sorbet
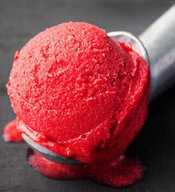 For those seeking a dairy-free option, sorbets and granitas are fantastic choices.
Sorbets are made from fruit purée, sugar, and water, while granitas are a coarser, icier version, often scraped with a fork during freezing to create a granular texture. This method does not require a machine, though sorbet can be churned for a smoother texture.
How it works (Sorbet):
- Blend fruit, sugar, and water into a purée.
- Freeze the mixture, stirring occasionally to prevent large ice crystals.
Pros:
- Dairy-free option
- Intense fruit flavours
- Refreshing and light
Cons:
- Can be icy if not prepared correctly
- Requires careful balance of sugar and fruit
- May need occasional stirring during freezing
Estimated Preparation Time:
- Prep time: 15-20 minutes
- Freezing time: 4-6 hours (with occasional stirring)
Ice Cream in a Blender
 This method is quick and involves minimal prep. Using frozen fruit as the base, you can blend it with cream or milk to create a soft-serve style ice cream in just minutes. While it won’t have the same creamy texture as churned ice cream, it’s a great option for those looking for something fast and relatively healthy.
How it works:
- Blend frozen fruit with a liquid base (such as milk or cream).
- Serve immediately for a soft-serve consistency.
Pros:
- Quick and easy
- Often healthier due to fruit base
- No special equipment beyond a blender
Cons:
- Soft-serve consistency, not firm like traditional ice cream
- Limited flavour options
- Best eaten immediately, doesn’t store well
Estimated Preparation Time:
- Prep time: 5 minutes
- Blending time: 2-3 minutes
- Serve immediately or freeze for 1-2 hours for firmer consistency
Naturally, these methods vary in difficulty, equipment needs, and the texture of the final product.
Whether you’re looking for a quick and easy method or you are ready to invest in making the creamiest, most luxurious ice cream, there’s an option listed here for every ice cream enthusiast.
For more detailed step-by-step guides on each method, check out our related articles and find the perfect fit for you:
- How to Make Homemade Ice Cream Without an Ice Cream Maker
- How to Make Homemade Ice Cream Using Ice Cream Makers
- Bags Of Fun: Learn How To Make Homemade Ice Cream In A Bag!
A Quick Quiz to Find Your Perfect Ice Cream-Making Method

Which Ice Cream Method Suits You Best?
With so many different ways to make ice cream, it can be tough to know where to start.
Whether you’re short on time, lacking equipment, or looking for a specific texture, the right method is there., it’s just a case of figuring out which one works best for you.
Our quick quiz will guide you through a few simple questions to help you figure out which ice cream-making method best suits your needs.
Once you’ve got your result, you can dive deeper into the perfect recipe and start creating your own frozen masterpiece.
Answer the following to work out the best method for you:
How much time do you have to make your ice cream?
a) Less than 15 minutes (Not including freezing time)
b) Around 30-60 minutes
c) I can dedicate a few hours, no rush!
a) → No-Churn Ice Cream
For a quick and easy recipe, no machine required!
Learn more about No-Churn Ice Cream – How to Make Homemade Ice Cream Without an Ice Cream Maker.
b) → Churned Ice Cream (Machine)
Invest a little time for perfectly churned, smooth ice cream.
Find out how to use an Ice Cream Machine – How to Make Homemade Ice Cream Using Ice Cream Makers.
c) → Frozen Yoghurt
If you have some extra time and want a healthier or refreshing option.
Discover Frozen Yoghurt recipes – Chill Out with Homemade Frozen Yoghurts With Our Easy Recipe and Tips.
What equipment do you have available?
a) Just a freezer and some basic kitchen tools
b) I have a blender or food processor
c) I own an ice cream maker machine
a) → Ice Cream in a Bag
Perfect for those with minimal equipment and a fun, hands-on method!
Learn how to make Ice Cream in a Bag – Bags Of Fun: Learn How To Make Homemade Ice Cream In A Bag!
b) → Blender Ice Cream
For those who want a quick soft-serve-style dessert.
Check out our article on Blender Pros and Cons – What is the Best Blender? Your Ultimate Kitchen Ally
c) → Churned Ice Cream (Machine)
The best option if you have an ice cream machine for ultimate texture control.
Step-by-step guide to Churned Ice Cream – How to Make Homemade Ice Cream Using Ice Cream Makers
What texture do you prefer?
a) Light and airy
b) Thick and creamy
c) Refreshing and icy
a) → Churned Ice Cream
For that perfect light and airy texture.
Master the art of Churned Ice Cream – How to Make Homemade Ice Cream Using Ice Cream Makers.
b) → No-Churn Ice Cream
Rich, thick, and creamy without the need for a machine.
Explore our No-Churn Ice Cream options – How to Make Homemade Ice Cream Without an Ice Cream Maker.
c) → Sorbet
A refreshing, icy texture without dairy.
===> Click here to discover more about Sorbet – A ‘Lighter’ Alternative to Ice Cream.
Do you have any specific dietary needs?
a) Dairy-free or vegan
b) Low-fat or healthy options
c) No restrictions!
a) → Sorbet or Vegan No-Churn Ice Cream
Dairy-free and full of flavour!
===> Click here to find Sorbet & Vegan Ice Cream recipes
b) → Frozen Yoghurt
A lighter, healthier option that’s easy to make.
===> Click here to learn how to make Frozen Yoghurt
c) → Churned or No-Churn Ice Cream
No restrictions? Both options are open to you!
===> Click here to find Recipes and Methods for both Churned and No-Churn Ice Cream.
❓ Frequently Asked Questions About Ice Cream-Making Methods
Q: What’s the main difference between churned and no-churn ice cream?
A: Churned ice cream is made in a machine that continuously mixes the base while it freezes, creating a smooth, airy texture. No-churn ice cream skips the machine and is frozen directly, usually with condensed milk and whipped cream, resulting in a denser but still creamy dessert.
Q: Do I need an ice cream machine to make good homemade ice cream?
A: No! You can make delicious ice cream without a machine using no-churn recipes, ice cream in a bag, blender ice cream, or frozen yoghurt. A machine just gives you more consistent, creamier results.
Q: Which method makes the healthiest homemade ice cream?
A: Frozen yoghurt and sorbet are lighter options with less fat and fewer calories compared to traditional churned or no-churn ice cream. Sorbet is also dairy-free, making it a great vegan option.
Q: Can kids make ice cream without a machine?
A: Yes! Ice cream in a bag is a fun, hands-on method perfect for children. It only requires resealable bags, ice, salt, and a simple ice cream base.
Q: Which method gives the fastest results?
A: Blender ice cream is the quickest method — simply blend frozen fruit with cream or milk for a soft-serve style dessert in minutes.
Wrapping It Up – Which Ice Cream Method Is Right for You?
Choosing the right ice cream-making method depends on your time, equipment, and desired outcome. Whether you opt for the traditional churned method, a quick no-churn recipe, or a fun alternative like ice cream in a bag, each technique offers a unique experience.
Experiment with different methods to find your perfect option, and remember that the fun of homemade ice cream lies not just in the result, but in the process itself.
By understanding the pros and cons of each method, you can confidently choose the one that best suits your kitchen setup and the type of ice cream experience you’re aiming for.
Key Takeaways:
- If you love consistent, creamy ice cream and have the time and equipment, a churned method using a machine might be your best bet.
- For those seeking simplicity and quick preparation, no-churn ice cream delivers rich, creamy results without special equipment.
- If you’re looking for something fun and interactive? Ice cream in a bag is a hands-on method perfect for kids or those who want a single serving.
- Want a healthier, lighter treat? Try frozen yoghurt or sorbet, with refreshing textures and simple prep.
No matter which method you choose, there’s something for every ice cream lover.
If you’re still unsure, our quiz above is a great way to determine the best method for you. Once you’ve decided, head on over to our related articles to start crafting your own frozen masterpiece.
We hope you have enjoyed our article – To Churn Or Not To Churn? Which Ice Cream Making Method Suits You Best? – and we hope that we have provided you with a clear overview to help you choose which method is best for you.
If you have any questions, please do drop us a comment below and we’ll happily get back to you.
Stay connected for more homemade ice cream inspiration! Share your homemade ice cream masterpieces with us on social media, and connect with a community of ice cream enthusiasts. Join us for mouthwatering recipes, expert tips, and exclusive updates. Follow us on Pinterest, Instagram, Facebook, and X by clicking on any of the social media icons below.
Disclosure: This post contains affiliate links. If you click on these links and make a purchase, we may earn a small commission at no additional cost to you. This helps support our website and allows us to continue creating content. Thank you for your support!











What an excellent exploration of ice cream-making methods! I love how you highlighted the different techniques, from the classic churn to the no-churn options. Each method brings its own charm and creativity to the process.For me, there’s something truly special about the traditional churn method.
The anticipation of watching the mixture transform into creamy goodness is part of the fun! But I also appreciate the simplicity of no-churn recipes, especially when I’m short on time.I’m curious, though—what’s your personal favorite method and why? Do you have a go-to flavor that you love to make?
Hi there,
Thank you so much for your thoughtful and enthusiastic comment! I’m so pleased you enjoyed the exploration of different ice cream-making methods. It is fascinating how each technique brings its own charm to the process, isn’t it?
I completely agree with you about the traditional churn method, it’s such a satisfying experience to see the mixture slowly transform into creamy perfection, and it really adds to the joy of making ice cream from scratch.
That said, no-churn recipes are absolute lifesavers when time is short or you’re craving something quick and delicious.
As for my personal favourite, I must admit I have a soft spot for the churn method too. There’s just something about the texture and richness you can achieve with it that feels extra indulgent.
Hmm, my go-to flavour ?? I have so many. But I’d say a classic salted caramel would be a personal favourite. I love the balance of sweet and savoury notes.
What about you? Do you have a favourite flavour you like to make? I’d love to hear your thoughts!
Wishing you the very best,
Cherie