Learn the joy of crafting delicious homemade ice cream with our beginner-friendly, easy-to-follow guide. You can master the art of making homemade ice cream treats!
Who doesn’t love a scoop of velvety, indulgent ice cream? It’s a universal treat, cherished across cultures and generations. But have you ever considered crafting your own? Homemade ice cream not only allows you to tailor flavours to your preferences but also ensures you know exactly what goes into each delectable spoonful.
 In this article; Learn To Make Homemade Ice Cream – A Beginners Guide, we’ll walk you through the process step by step, providing plenty of tips and tricks to ensure your homemade creations rival those of the finest parlours!
Ready to dive into the world of homemade ice cream? Let’s get started!
If you’d like to go straight to an easy first time recipe, please click the link below.
Jump to Basic Ice Cream Recipe
The Benefits of Making Your Own Homemade Ice Cream
When you make ice cream at home, control is in your hands. Choose something that resonates with you, like organic, non-GMO, or dairy-free options. There’s a lot of opportunity in tailoring your dessert to dietary preferences and health considerations, ensuring everyone can enjoy it without compromise.
And consider the family factor. Involving friends and relatives in the process isn’t just fun; it fosters connection and makes for an enjoyable activity that’s more than just the eating. Creating memories as you create scoops – it’s a double scoop of win-win.
What about the nutritional benefits? When you’re in charge, you can adjust the sugar level, opt for natural sweeteners, or pack in some fresh fruits. The result? A dessert you can feel GOOD about serving and there’s a huge sense of satisfaction and achievement in creating something so delicious from scratch.
And fear not, embarking on this culinary adventure doesn’t require years of experience or a pantry full of ingredients. In fact, making ice cream at home can be surprisingly straightforward, even for the most hesitant of cooks.
Consider Your Options: Different Methods for Making Homemade Ice Cream
Before you commence crafting your homemade ice cream masterpiece, it’s essential to consider the method you’ll employ. Whether you opt for the convenience of an ice cream maker or the simplicity of a no-churn method, each approach offers its unique set of advantages and considerations.
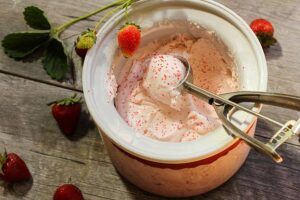 Let’s explore these options to find the perfect fit for your ice cream-making journey.
Here are some methods for making homemade ice cream:
- Using an Ice Cream Maker: This is the traditional method, involving a machine that churns the mixture as it freezes, creating a smooth texture.
- No-Churn Method: This method doesn’t require an ice cream maker and typically involves whipping cream and whole milk or condensed milk together to create a creamy base.
- Bag Method: Ice cream ingredients are placed in a sealed bag and mixed with ice and salt in another bag, then shaken vigorously until frozen.
- Jar Method: Similar to the bag method, but ingredients are placed in a jar and shaken until frozen.
- Freezing in Trays: Pour the ice cream mixture into shallow trays and freeze, then stirring periodically as it freezes to break up ice crystals.
- Blender Method: Mix the ingredients in a blender, then freeze the mixture in an ice cube tray and blend again until smooth.
- Food Processor Method: Use a food processor to blend the ingredients, then freeze in a container, stirring occasionally until frozen.
Each method offers a different level of simplicity and requires varying amounts of time and effort.
Essential Equipment for Homemade Ice Cream Beginners
Apart from an ice cream maker, there are a few kitchen staples that you’re going to need. You’ll likely have most of these utensils already.
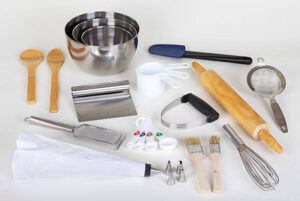 A good sturdy spatula, a whisk, and a set of measuring cups and spoons are must-haves. Mixing bowls, weighing scales, and saucepans are useful to have at the ready. A handful of spoons for tasting – you always need lots of spoons as you check your flavours as you don’t want to be double dipping, lol.
And let’s not forget a reliable freezer container for storing your ice cream. Choose something that seals tightly to prevent freezer burn and keeps your delicious creation at its best.
For a full list of items you might require, please check out our article – What Equipment do you need to make Homemade Ice Cream? – which provides details and handy links to all items you might need.
Choosing Your Flavours: Where Creativity Meets Creaminess
One of the most exciting aspects of making homemade ice cream is the endless array of flavours you can explore. From classic favourites like vanilla and chocolate to more adventurous combinations like salted caramel or mint chocolate chip, the possibilities are limited only by your imagination.
In this guide, we’ll help you discover the art of flavour pairing, offering suggestions and inspiration to unleash your inner ice cream artist.
Whether you’re a fan of fruity sorbets, decadent chocolate treats, or refreshing citrus blends, we’ll show you how to create mouthwatering combinations that will have your taste buds tingling.
Making Homemade Ice Cream: A Simplified Step-By-Step Guide
Making homemade ice cream may seem daunting at first, but it’s surprisingly simple once you break it down.
There are a handful of basic steps you’ll need to learn to create creamy, delicious ice cream right in your own kitchen. From preparing the base to churning and freezing, each step plays a crucial role in achieving that perfect scoop.
We’ve provided bullet points of the steps you’ll need to take;
- Prepare Your Ingredients: Gather fresh dairy, flavourings, and sweeteners according to your chosen recipe.
- Mix and Heat: Combine your ingredients and heat gently on the stove to infuse flavours and dissolve sugars.
- Chill: Allow your mixture to cool completely in the refrigerator before churning.
- Churn and Freeze: Pour your chilled mixture into an ice cream maker and follow the manufacturer’s instructions.
- Enjoy: Scoop your freshly churned ice cream into bowls or cones and savour the creamy goodness!
Crafting Your Ice Cream: Ingredient Options and Methods
When it comes to crafting your own ice cream, there are a couple of methods to consider. You can opt for an eggless version, perfect for those with dietary restrictions, or try the traditional rich, custard-base with an egg custard method.
Alternatively, explore the convenience of using an ice cream maker for a traditional churned texture, or embrace the simplicity of a no-churn recipe for a fuss-free dessert experience.
Eggless Ice Cream:
This is a really simple and easy method to use. Making ice cream without eggs typically results in a lighter and less creamy texture compared to custard-based recipes. Eggless ice cream tends to be more scoopable straight from the freezer and can have a slightly icier texture.
However, it still offers a deliciously smooth and refreshing treat, especially when paired with flavourful mix-ins or toppings.
Additionally, eggless recipes are often preferred by those with dietary restrictions or allergies to eggs.
Ingredients:
- Double cream (also referred to as Heavy Cream)
- Whole Milk
- Sugar
- Vanilla extract (or any other flavourings)
So, here’s how you do it: heat your milk and add your sugar, stir until the sugar has dissolved, then add your cream and Vanilla extract, stir thoroughly, and allow the mixture to cool. After chilling, churn it until it’s airy and frozen, or if you’re using a no-churn method, simply pour your mixture into a freezer-safe container and place it in a freezer, in order to avoid large icicles from forming, stir the mixture every half an hour until it is set.
Egg-Custard Based Ice Cream:
Some will say this is the only way to make ice cream, as the end result is creamier, richer etc. It’s a little hard to prepare, but not too onerous, even for a beginner.
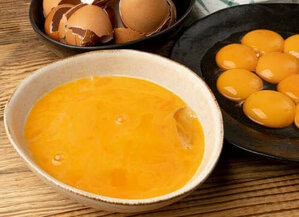
This is where your egg yolks come into play. They’re not just there for texture; they also help prevent ice crystal formation.
 Ingredients:
- Double Cream (Also referred to as Heavy Cream)
- Whole milk
- Egg yolks
- Sugar
- Vanilla extract (or any other flavourings)
Slightly different approach to the egg-less method. You mix your sugar with the egg yolks, heat your milk and cream gently, then combine them and cook until it’s just thick enough to coat the back of a spoon. Then allow the mixture to cool and proceed with the churning process.
Below is a tutorial video taking you through the process described above:
Other Methods of Making Ice Cream:
- No-Churn Ice Cream: Utilises a mixture of condensed milk and whipped cream, eliminating the need for an ice cream maker.
- Ice Cream in a Bag: Mix ingredients in a sealed bag and shake until frozen.
- Ice Cream in a Jar: Similar to the bag method, but using a jar instead.
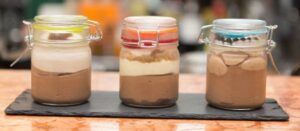 These methods offer a variety of options for making homemade ice cream to suit different preferences and equipment availability.
Mastering the Basics: Your First Ice Cream Recipe
Vanilla ice cream has stood the test of time being one of the world’s favourite ice cream flavours. Vanilla provides a foundation that you can build on with a variety of other flavours at a later stage.
In its simplest form, ice cream is a mixture of milk, cream, sugar, and vanilla. But each ingredient has a role to play. The cream gives richness and volume, milk adds lightness, sugar brings sweetness and lowers the freezing point, and vanilla offers that quintessential ice cream flavour and it’s just a case of bringing these basic ingredients together using a process that will enable you to create ice cream. It’s a lot simpler than you might think.
And don’t worry too much about making it perfect on your first try. It’s all about learning.
Let’s start with a simple Eggless Vanilla Ice Cream recipe. It’s a great starting point, and it’ll introduce you to the importance of measuring and patience during the freezing process.
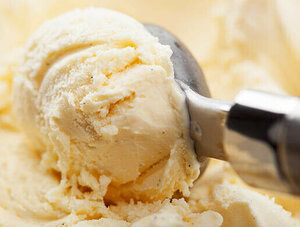
Ingredients:
- 500ml double cream
- 200ml whole milk
- 100g caster sugar
- 1 teaspoon vanilla extract
Instructions:
- In a saucepan, heat the whole milk over medium heat until it’s warm but not boiling.
- Remove the saucepan from the heat and let it cool slightly.
- In a large mixing bowl, combine the double cream, caster sugar, and vanilla extract.
- Gradually pour the warm milk into the cream mixture, whisking continuously until the sugar has dissolved completely.
- Once the mixture is well combined, cover the bowl with cling film and refrigerate for at least 2 hours or until chilled.
- Once chilled, pour the mixture into an ice cream maker and churn according to the manufacturer’s instructions until it reaches a soft-serve consistency.
- Remember if you’re going with the no-churn option, then you simply pour the mixture into a freezer-safe container and freeze. Every 30 minutes, stir the mixture vigorously with a fork to break up ice crystals, repeating this process for about 3-4 hours or until the ice cream is firm.
- When you’ve completed this stage, the ice cream will be a soft-serve consistency, which you can serve straight away or place it in the freezer to firm up some more.
- If you’d like a firmer texture, transfer the churned ice cream into a freezer-safe container, cover it, and freeze for an additional 4-6 hours.
Again, by making your own ice cream, you can experiment with the amount of sugar and cream to find what suits your taste. Remember, too much sugar can make your ice cream too soft, and not enough can lead to iciness.
Choose something that resonates with you. If you’re adventurous, try infusing the milk with coffee beans or a cinnamon stick during the heating process for a more complex flavour profile.
Now, once you’ve got the basics down, you’re all set for the exciting part. This isn’t just about making ice cream; it’s about creating an experience. Next up, we’re getting ready to play with flavours and combining additional texture into your ice creams.
Flavour Experiments: Expanding Your Ice Cream Repertoire
So, you’ve mastered the classic vanilla. But why stop there? The beauty of making ice cream at home is the endless possibilities for creativity. Let’s get into how you can start playing with flavours to make your own signature creations.
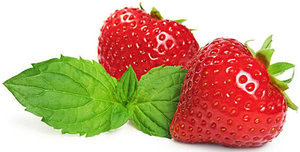 For starters, consider natural flavourings. These can be anything from ripe strawberries to fresh mint leaves. You’re looking for ingredients that infuse your ice cream with authentic, robust tastes. Don’t shy away from spices like cinnamon or extracts like almond – they can make things really interesting.
It’s not just about tossing in a handful of goodies and hoping for the best. Balance is key. Too much of any one ingredient can overpower the others. Start with a small amount, taste, and then add more if needed. Remember, it’s always easier to add than to take away.
Embrace the seasons by picking flavours that are in their prime. Think peppermint in spring. fresh strawberries in summer, Blackberries toward the end of summer, and Pumpkins in Autumn. This approach keeps your ice cream-making relevant and exciting throughout the year.
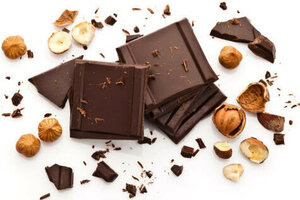 And what about mix-ins? From chunks of chocolate to toasted nuts, your options are boundless. Here’s our guidance – fold these in at the end of the churning process to maintain their texture and integrity. So you can bite into a scoop of freshly made ice cream and find little burst of flavours and textures in your smooth and creamy ice cream.
After playing with flavours and feeling good about the results, you’re ready to share and preserve your creations. This is where you ensure your ice cream stays delicious until that next craving hits. So, how do you do that? It’s simpler than you may think, and that’s what we’re going to discuss next.
Here’s a link to our recipes and methods section where you’ll find a wide selection of Ice Cream recipes that you might like to try out – Recipes & Methods – Frosted Fusions
Sharing the Scoop: Preserving and Serving Your Homemade Delights
Having worked hard on your homemade ice cream creation, you want to ensure you can keep it stored (if indeed it lasts long enough and isn’t devoured straight away).
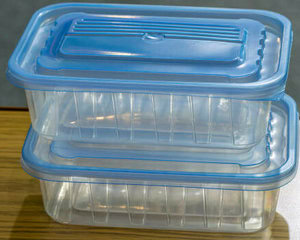 So let’s explain how you ensure your homemade ice cream stays as delicious as the moment it churned to perfection.
Firstly, storage is key. You’ll want airtight containers that protect your ice cream from freezer burn. Ideally shallow containers for quicker thawing when you’re ready to enjoy.
Click this link to see our article – What Equipment Do You Need to Make Homemade Ice Cream? – for some useful links for Airtight Food Storage Containers.
When it’s time to serve, think outside the cone. You can always go classic, but how about pairing your ice cream with warm desserts or making your own sundaes? Remember to let your ice cream sit for a few minutes at room temperature for that perfectly scoopable texture.
 And let’s not forget about the social magic of ice cream. Inviting friends over for a tasting party or making a batch for a family gathering brings people together. It’s more than just dessert; it’s an experience. Just ensure you have enough spoons (remember, no double dipping!) and toppings to go around!
Lastly, if you find yourself with leftovers, don’t worry. Homemade ice cream can taste just as good the second time around if you store it right. Just smooth the surface each time you serve it, to avoid ice crystals, and tightly seal the container. It’s small steps like these that keep your homemade batches as delicious as your first taste.
We hope our article – Learn To Make Homemade Ice Cream – A Beginners Guide, has provided you with all the necessary information, guidance and above all confidence to try and attempt making your own homemade ice cream.
If you have any questions at all, please drop us a comment below and we’ll happily get back to you.
And naturally, we would love to hear how you get on making your own homemade ice cream.
Stay connected for endless homemade ice cream inspiration! Join us for mouthwatering recipes, expert tips, and exclusive updates. Follow us on Pinterest, Instagram, Facebook, and X by clicking on any of the social media icons below.


















An excellent guide to help one on the joy of ‘homemade’ ice cream. Thank you Cherie for an easy guide to get started. You show us all what we need, and what we have to look forward to!
Last year while browsing ‘garage sales’ in a nearby city, I came across a used ice cream maker in it’s original box for $2.50, and being a very hot day I decided to buy it. I got it home, all the pieces were there and the motor worked. No manual, no recipes, so I put it away.
Now, after I make a short shopping list for my wife, we will finally put it to the test and make some “homemade’ ice cream(we both love vanilla!). Thanks for your help!
Hey Ernie,
Thanks for your comment, really glad that you appreciated the article, and it’s great to get feedback. Hard to present everything needed, without overwhelming our readers. So it’s good to know our article was easy to follow and has inspired you.
Love that you bought yourself and an ice cream maker and now our article has encouraged you to dust it off and put it to use and get churning. Love that!
Vanilla is one of my favourites too. Simple, unassuming, but oh so good.
There are lots more hints and tips we have shared in various articles on our site, one in particular – How to make Delicious, Indulgent, Homemade Ice Cream – has lots of guidance to help you out.
Once again, thanks for dropping by and please do let us know how you get on.
All the very best
Cherie :o)
shaken until frozen. this does not make sense. until if frozen it would mean we have to be in the freezer to shake it.!!!
Hi Jent,
Thank you so much for taking the time to comment — I really appreciate you pointing this out! I can see how that wording might have come across a tad ambiguous.
When we say “shaken until frozen” for methods like the bag or jar technique, we mean that the shaking action itself (combined with the ice and salt around the inner bag or jar) helps freeze the mixture as you shake it. So you’re absolutely right — no need to stand inside the freezer shaking the bag! The salt and ice lower the temperature around the mixture, and your shaking keeps it moving so it freezes evenly without forming large ice crystals.
I’ll look at tweaking the wording in that section to make it clearer for future readers.
Thanks for dropping by and if you have any other questions, or directions aren’t clear, please don’t hesitate to let us know.
Wishing you all the very best,
Cherie
Warm wishes,
Cherie