Craving ice cream but don’t have an ice cream maker? No worries — this fun and foolproof ice cream in a bag method is perfect for kids, parties, or just a little kitchen magic on a hot afternoon.
There’s no need for an ice cream maker to enjoy rich, creamy homemade ice cream ever again!
Using just a few basic ingredients, zip-lock bags, and a little elbow grease (aka shaking!), you’ll create creamy, customisable ice cream — no special equipment required.
In this guide, we’ll walk you through:
✅ How ice cream in a bag works (the fun + the science)
✅ What you need to get started
✅ Step-by-step instructions
✅ Fun flavour twists & mix-in ideas
✅ Bonus: Try the Ice Cream Ball method!
This fun, no-machine method is the perfect activity for kids and adults alike to create delicious homemade fun.
Get ready for bags of fun as we talk you through this easy technique for churning out small batches of customisable ice cream flavours without any special equipment.
It’s hands-on, super satisfying, and ready in under 15 minutes. Let’s get shaking!
If you’d like to go straight to our Homemade Ice Cream in a Bag recipe, use the following link, or read along to find out more about this fun method of making ice cream.
What Is “Ice Cream in a Bag” — And How Does It Work?
You don’t need fancy equipment to churn out creamy, scoopable ice cream—just a zip-lock bag, some ice, salt, and a little bit of science.
“Did you know? Salt lowers the freezing point of ice to around −18 °C (0 °F), turning your simple shake into science in action!”
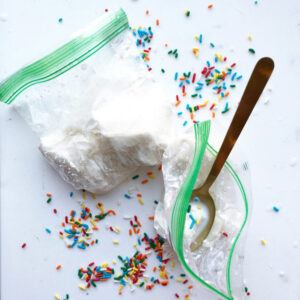
Here’s how it works: by sealing your ice cream mix (cream, sugar, vanilla, etc.) in a small bag, then placing that inside a larger bag filled with ice and rock salt, you create an ultra-cold environment that flash-freezes the mixture. As you shake the bags, the constant movement mimics churning, incorporating air and breaking up ice crystals – just like a traditional ice cream machine would.
The double-bag setup keeps everything clean and efficient, making this method perfect for kids, classroom activities, parties, or just fun afternoon treats. It’s hands-on, fast (ready in under 15 minutes!), and a sweet way to blend kitchen fun with science discovery.
The Science Bit (Short and Sweet)
Can you seriously make ice cream in a bag? Yes, and here’s the short and sweet version:
- Salt + Ice = Super Cold Slush: When salt is added to ice, it lowers the freezing point, creating a cold enough environment to freeze cream quickly.
- Shaking = Churning: Constant movement incorporates air and breaks up ice crystals, giving you a smoother, fluffier texture.
- Double Bag = Smart Setup: The small bag holds the ice cream mix; the big bag holds the icy salt slush. Keep them separate so your dessert stays clean but freezes efficiently.
It’s kitchen chemistry and dessert — what’s not to love? And it’s a fun, interactive way to make small batches of fresh ice cream right at home.
The bag method is a perfect opportunity for kids to get hands-on with making their own frozen treats, and it’s also an easy technique for adults wanting to experiment with custom ice cream flavours using just a few simple ingredients.
Best of all, you can have fresh homemade ice cream ready in under 15 minutes using this clever, no-machine, bags of fun, bag-shaking approach!
Ice Cream in a Bag – What You’ll Need
 Ingredients:
- 300ml double cream
- 150ml whole milk (optional – for lighter texture)
- 75g caster sugar
- 1 tsp vanilla extract
- Pinch of salt
- Optional: chocolate chips, fruit, crushed biscuits, etc.
Equipment:
- 1 small zip-lock bag (about 500ml)
- 1 large zip-lock bag (3.8 L or 1 gallon)
- Ice cubes (about 1.5–2 L worth)
- 120g rock salt or coarse sea salt
- A tea towel or gloves (it gets cold!)
👉🏽 Need extra equipment? Check out our useful guide – What Equipment Do You Need To Make Homemade Ice Cream?
How to Make Ice Cream in a Bag (Step-by-Step)
Step 1: Mix the Base
- Add cream, milk, sugar, vanilla, and a pinch of salt into the small bag.
- Seal tightly and remove excess air.
Step 2: Prep the Ice Bag
- Fill the large bag halfway with ice and add rock salt.
- Give it a quick shake to distribute.
Step 3: Combine & Shake
- Place the small sealed bag inside the larger one.
- Wrap in a towel or wear gloves and shake vigorously for 5–10 minutes.
Step 4: Check Consistency
- Once it thickens to a soft-serve texture, open the bags.
- Be careful to avoid getting any saltwater into your ice cream!
Step 5: Add Extras (Optional)
- Stir in your mix-ins, reseal, and shake for another minute to combine.
Step 6: Serve & Enjoy!
- Scoop straight into bowls or cones.
- For a firmer texture, pop it in the freezer for 1–2 hours.
It’s that simple; homemade ice cream made in a bag – no fancy ice cream makers required and a workout for your arms too, win-win!
This fun and easy method not only delivers delicious, creamy ice cream but also provides a fun activity for kids and adults alike.
Whether you’re looking to cool down on a hot summer day or just want to enjoy a tasty treat, this “Bags of Fun” approach is sure to bring smiles all around.
So grab your ingredients, get shaking, and enjoy the sweet rewards of your hard work.
Pro Tips
- Use double-bagging to prevent leaks.
- Wrap in a towel or use oven mitts — it gets icy cold!
- Pre-freeze mix-ins like chocolate chips so they don’t melt your base.
- Try flavour swaps like peppermint, almond extract, or lemon zest.
How About Ice Cream in a Ball?
Seriously, this is a thing!
If you’re looking for another fun and interactive way to make homemade ice cream, consider trying the “Ice Cream in a Ball” method.
This innovative approach uses a specially designed ice cream ball that you can fill with your ice cream ingredients and ice, then kick, roll, or shake to create delicious ice cream.
These ice cream balls are perfect for outdoor activities, family gatherings, or just a playful way to enjoy a sweet treat.
How It Works
The ice cream ball is divided into two compartments: one for the ice cream mixture and the other for ice and rock salt.
 To get started, simply pour your ice cream base (a mix of cream, sugar, and flavourings) into the designated compartment. Fill the other compartment with ice and rock salt, which will help lower the temperature and freeze the ice cream mixture as you play.
Once both compartments are filled and securely closed, the fun begins!
Kick, roll, or shake the ball for about 20-30 minutes. The movement helps churn the ice cream mixture, incorporating air and preventing large ice crystals from forming, resulting in a smooth and creamy texture.
After playtime, open the ball to reveal your freshly made ice cream, ready to be scooped and enjoyed.
Why Not Try It?
The “Ice Cream in a Ball” method is not only a unique way to make ice cream but also a great way to get everyone involved in the process.
It’s an excellent activity for kids, encouraging them to be active while learning a bit about the science of ice cream making.
Plus, it’s a fantastic option for picnics, camping trips, or any outdoor event where you want to combine fun and dessert.

So, if you’re looking to add a bit of excitement to your ice cream making, give the ice cream ball a try. It’s an innovative and fun way to enjoy homemade ice cream with a twist of playfulness and creativity.
===> Click here to see the Soft Shell Ice Cream Ball.
Disclosure: This post contains affiliate links, which means that we may receive a commission if you make a purchase using these links. As an Amazon Associate, we earn from qualifying purchases.
Have a look at the following YouTube Video to see the Ice Cream ball-making method in action:
👉🏽 Want more no-churn ideas? Check out our guide: How to Make Ice Cream Without an Ice Cream Maker
🧊 Ready to Shake Things Up?
Homemade ice cream in a bag isn’t just a sweet treat — it’s a hands-on adventure! Whether you’re planning a party, a summer science experiment, or just craving a creative dessert, this method brings the fun.
What’s your ultimate ice cream mix-in? From fruity bursts to cookie crumbles, we’d love to hear your flavour combos! Share your results in the comments or tag us on Instagram or Pinterest for a chance to be featured.
The Final Scoop
You’ve just mastered a fun, equipment-free way to make homemade ice cream in about 15 minutes! With simple ingredients, a shake or two, and a sprinkle of kitchen science, you can whip up delicious, customisable treats anyone will love.
Whether you’re making an afternoon treat with berries or a flavour-packed party option with mix-ins, this method is quick, easy, and perfect for all ages. Shake it, scoop it, enjoy it—bags of fun guaranteed!
We hope that you have enjoyed our article – Bags Of Fun – Learn How To Make Homemade Ice Cream In A Bag! – and that we have inspired you to give this unique method of making ice cream a go. Great fun for the family and delicious ice cream to devour after your endeavours.
Do let us know if you have any questions by dropping a comment below, and of course, we would love to hear from you about your Ice Cream in a bag or ball experiences.
Stay connected for endless homemade ice cream inspiration! Join us for mouthwatering recipes, expert tips, and exclusive updates. Follow us on Pinterest, Instagram, Facebook, and X by clicking on any of the social media icons below.
Disclosure: This post contains affiliate links. If you click on these links and make a purchase, we may earn a small commission at no additional cost to you. This helps support our website and allows us to continue creating content. Thank you for your support!


Thank you for sharing this! I tried making ice cream in a bag, and it was a blast! The process is super simple and the results were delicious. It was a fun activity to do with the kids—they loved shaking the bags and adding their favorite mix-ins. We made a batch of vanilla and added chocolate chips, and it turned out creamy and smooth. Definitely a great way to enjoy homemade ice cream without needing any special equipment. Looking forward to trying the ice cream ball method next!
Hey Amanda,
Thanks for your comment and for taking the time to share your experiences. So cool that you tried this ice cream in a bag method out!😎 It’s bags of fun isn’t it?
Glad you found the process simple and even happier that you achieved delicious results and your kids enjoyed the activity too! It is very cool getting the little ones involved in such a hands-on, fun activity and even better that they have the results of their hard labour to enjoy afterward too.
Please let us know how you get on with the ball method. Did you know you can also do the same in a jar? Very much the same method, just as simple, and just as much fun!
Thanks again for dropping by and Happy Ice Cream Making!
All the very best
Cherie :o)
Thank you for this detailed and fun guide on making ice cream in a bag! I love how accessible and engaging this method is, especially for kids. I can’t wait to try it out with my family this weekend. Do you have any tips for creating unique flavor combinations or mix-ins that work particularly well with this method?
It is really a unique idea and will be for the ages to come, cheers !!
Hey Bright Digi Minds,
Thanks for dropping by and sharing your thoughts on our article – Bags Of Fun: Learn How To Make Homemade Ice Cream In A Bag! – Frosted Fusions.
It truly is a great activity to involve the entire family, lots of fun to be had, and a delicious reward for your efforts at the end of it.
Regarding your Q on unique flavor combo’s – really there are no limits. Try out flavours that resonate with you and your family – fresh fruits, chocolate chips, nuts, it’s entirely up to you with what flavours and textures you like.
Really glad you appreciate the article and method.
We’d love to hear how you get on when you give it a go, of course, any questions, please just shout out.
Thanks once again for your message and wishing you all the best.
Cherie :o)