Got a basket of blackberries? Learn how to transform 2kg into ice cream, sorbet, frozen yoghurt & jam — delicious recipes & tips.
Blackberry season has arrived—right on cue with the school run (Aunty Ann was spot-on!). Yesterday’s forage delivered just under 2 kg of glossy berries from the garden and hedgerows—plus a few nettle stings for good measure.
Here’s how to turn that haul into four knockout frozen desserts: a silky Blackberry Ripple Ice Cream, zingy Sorbet, creamy Frozen Yoghurt, and a classic Jam.
“Pick, prep, and preserve—think of your 2 kg as four delicious projects waiting to happen.”
Aunty Ann’s Wisdom…
My Lovely Aunty Ann, sadly no longer with us, would always tell me that Blackberries wouldn’t be ready until the kids go back to school! In the UK, that would typically be around the first week of September, after the six-week summer holidays.
And guess what, Aunty Ann was right! Most schools will reopen this coming week in the UK (article written 3rd September 2023), and yesterday I went Blackberry picking as there are tonnes this year!
I am very fortunate to have many growing in my garden and the surrounding area where I live. After around an hour, and a few minor cuts and stings, I weighed up just under 2 kgs of Blackberries!
So what did I do with my bounty? (Hmm, coconut ice cream encased in chocolate! Just like a bounty!) That was literally a ping moment there. I’ll have to give that combo a go very soon.
Let me show you how you can easily make a Homemade Blackberry Ice Cream and possibly a Homemade Blackberry Sorbet too!
If you’d prefer, you can head directly to the recipes we have shared, click on the following links:
An Abundance of Nature’s Jewels
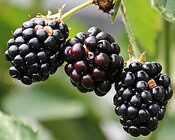
What to do with 2 kg of blackberries (at a glance)
- 250 g → Blackberry Ripple Ice Cream
- 500 g → Blackberry Sorbet
- 250 g → Blackberry Frozen Yoghurt
- 1 kg → Blackberry Jam (≈ 4–6 × 240 ml jars)
Tip: Rinse gently, dry on kitchen paper, and weigh before you start—allocating the fruit up-front makes the day flow.
Blackberries – Tiny Treasures Packed with Health Benefits.
Like all berries, Blackberries are packed with goodness, they are nutrient-rich, and bursting with vitamins and antioxidants.
Blackberry benefits (short & sweet)
- Vitamin C & K + manganese for immune support and bones
- Anthocyanins (antioxidants) linked with heart & brain health
- Fibre for digestion and steady energy
- Naturally low in calories, big on flavour
As always, berries are brilliant—but balance is best. Enjoy them as part of a varied diet.
Blackberry Picking – There’s An Art To It
Blackberries are ready for harvesting in late summer, and that’s when it’s best to pick them. You can find these juicy berries along hedges, in forests, and even in cities. To pick them, you’ll need a basket and clothes that protect you from thorns (unlike me, as I got scratched and stung), and then you’re ready for a fun blackberry-picking adventure.
Be aware – I came across a wasp’s nest in the hedgerow where I was harvesting, which I appeared to be disturbing a little whilst picking my blackberries.
Naturally, I moved away once I saw them heading in my direction.
But be warned to keep an eye out and to observe nature whilst out and about blackberry picking.
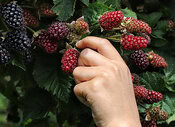 Picking & safety quick guide
- Timing: Late summer to early autumn; ripe berries come away with a light tug.
- Kit: Long sleeves, basket, and gloves near brambles.
- Look out: Wasps love brambles—move on if you spot a nest or lots of activity.
- Prep at home: Rinse, dry, and freeze flat on a tray before bagging to prevent clumps.
How to Use 2 Kg of Freshly Picked Blackberries – Endless Possibilities…
With two kilos of these plump, juicy blackberries in your basket, you’re in for a berry-delicious adventure.
There are endless ways you can enjoy their sweet and tart flavours, like making traditional jams, pies, cobblers, and, of course, delicious homemade blackberry ice cream.
Let’s take a look at some tasty recipes and creative ideas to make the most of your summer berry harvest.
Homemade Blackberry Ripple Ice Cream Recipe
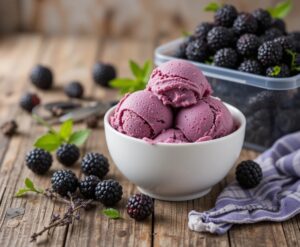
Here’s our recipe for a delicious Homemade Blackberry Ripple Ice Cream;
(Makes: ~900 ml | Prep: 20 mins | Chill/Freeze: 6–8 hrs)
Ingredients
- Blackberry ripple: 250 g blackberries, 60 g sugar, 1 tbsp lemon juice
- Base: 250 ml double cream, 125 ml whole milk, 75 g sugar, 1 tsp vanilla
Method
- Cook the ripple (seed-free): Simmer berries, sugar, and lemon (10–12 mins) until syrupy. Press through a sieve; cool.
- Base: Whisk cream, milk, sugar, vanilla until sugar dissolves. Chill 2 hrs.
- Churn: Churn base to soft-serve.
- Layer & ripple: In a tub, alternate ice cream and spoonfuls of ripple. Swirl lightly with a skewer.
- Freeze: 4 hrs+, until firm. Rest 5 mins before scooping.
Pro tip: Reserve 2-3 tbsp ripple for serving – warm briefly for a glossy drizzle.
Feel free to customise your blackberry ice cream by adding crushed cookies or chocolate chips for extra texture and flavour.
You can also adapt this recipe by adding a mixture of berries and not being limited to just one type. You can add strawberries, raspberries or blackberries to add a little something extra to your delicious Homemade Berry Ice Cream.
👉🏽 If you’d like to try this Homemade Blackberry Ice Cream recipe in a low-fat version, head on over to our article – Low-Fat Homemade Ice Cream: Indulgence Without Guilt – to see how you can adapt this recipe to meet your preferences.
1.75 Kilos of Blackberries Left!
Even after creating a deliciously fresh and tasty Homemade Blackberry Ice Cream, I was still left with a lot of Blackberries!
Not wanting these jewels to waste, I thought – A Sorbet! Light in texture, refreshing to the palate, limited additional ingredients, yup, sorbet it is.
Ice cream and sorbet are both similar in that they are frozen desserts, but they differ in their primary ingredients.
Ice cream is typically made with a base of milk or cream, sugar, and sometimes egg yolks, resulting in a creamy and dairy-rich treat. On the other hand, sorbet generally is dairy-free and primarily consists of fruit puree or juice, sugar, and water.
Sorbet is known for its intensely fruity and refreshing flavour, while ice cream tends to be creamier and has a richer texture due to the inclusion of dairy ingredients. Check out our post – Sorbet – A Lighter Alternative to Ice Cream – which details the differences in greater detail.
Blackberry Sorbet Recipe
Given that I still have 1.75kg of blackberries, I feel a sorbet is in order.
Here’s a quick and easy recipe for Homemade Blackberry Sorbet:
(Makes: ~700 ml | Prep: 10 mins | Chill/Freeze: 4–6 hrs)
Ingredients
- 500 g blackberries
- 80–120 g sugar (to taste)
- 125 ml water
- 1 tbsp lemon juice
Method
- Purée: Blend berries + lemon, then sieve for smoothness.
- Syrup: Heat water + sugar to dissolve; cool.
- Mix & chill: Combine purée + syrup; chill 2 hrs.
- Freeze: Churn, or freeze-and-stir every 30–40 mins until scoopable.
Pro tip: Start sweeter than you think—cold mutes sweetness by ~20%.
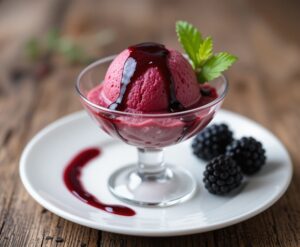
Feel free to garnish with fresh blackberries or a sprig of mint for an extra touch of elegance. Enjoy your homemade blackberry sorbet!
👉🏽 You can use alternative sugars in this recipe, be that Honey, Agave, Maple Syrup, Stevia, or Erythritol (see our post Diabetes and Ice Cream; Making Healthier Choices, which provides more details about Stevia and Erythritol)
👉🏽 Love the idea of something fruity and refreshing? Check out our post – Sorbet – A Lighter Alternative to Ice Cream – for more inspiration and recipes.
1.25 Kilos of Blackberries Left!
These Blackberries truly do go a long way!
Not wanting any of the blackberries I’ve harvested to go to waste, I think about what other treat I can make. A Frozen Yoghurt? Or perhaps a Jam? (aka Jelly in the US).
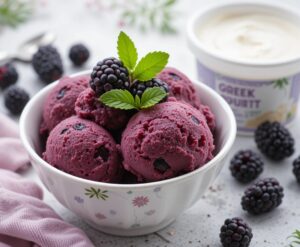
A Froyo it is – this one is made with Greek Yoghurt as opposed to whole milk, giving it a low-fat content.
Blackberry Frozen Yoghurt Recipe (Low-Fat)
Here’s our recipe for a lighter Froyo;
(Makes: ~700 ml | Prep: 10 mins | Chill/Freeze: 3–5 hrs)
Ingredients
- 250 g blackberries
- 125 ml Greek yoghurt
- 60 g honey/maple (to taste)
- 1 tsp vanilla
Method
- Purée berries (sieve if you prefer seed-free).
- Whisk yoghurt, honey/maple, vanilla; fold in purée.
- Chill 1–2 hrs; churn or freeze-and-stir to soft-serve; freeze to set 2–3 hrs.
- Pro tip: For extra creaminess, swap ¼ of the yoghurt for crème fraîche (not low-fat).
This blackberry frozen yoghurt is a delicious and healthier alternative to traditional ice cream. You can adjust the sweetness to your taste by adding more or less honey or maple syrup.
👉🏽 Want to make your frozen yoghurt even healthier? Learn more about Natural Sweeteners in Ice Cream and our guide on Diabetes & Ice Cream Choices where we cover erythritol, stevia, and more.
1kg of Blackberries Still Left!
Incredibly, I still have 1kg of freshly picked blackberries left, even though I’ve made a Homemade Blackberry Ice cream, Sorbet and a Frozen Yoghurt.
Okay, so we’re going to make a blackberry jam (aka Jelly in the US).
Homemade Blackberry Jam is a delicious sweet treat that captures the feeling of summer in a jar. It really is incredibly rewarding to turn those fresh, plump blackberries you picked into a sweet jam.
There you are, spreading your homemade blackberry jam on a warm slice of toast, you made that! There’s something quite rewarding about spreading your own homemade jam!
Every bite is bursting with the rich flavour of ripe blackberries, and knowing you made this jam yourself makes it taste even better.
Whether you enjoy it on toast, as a yoghurt topping, or in pastries, homemade blackberry jam adds a cosy and nostalgic touch to your breakfast.
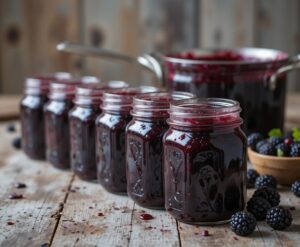
With 1kg of Blackberries left, we’ll need them all for this recipe, and it should produce approximately 4-6 240ml jars of jam, so you’ll have some spare that you can gift to friends or family.
Homemade Blackberry Jam Recipe
(Yield: 4–6 × 240 ml jars • Active: 25 mins)
Ingredients
- 1 kg blackberries
- 750 g jam sugar (with pectin)
- Juice of 1 lemon
Method
- Pan: Mash berries in a heavy saucepan; stir in sugar + lemon.
- Boil: Rapid boil 5–8 mins, stirring, to 105 °C (setting point) or until a chilled-plate test wrinkles.
- Jar: Skim foam; ladle hot jam into sterilised, warm jars. Seal; cool.
Pro tip: A sugar thermometer removes the guesswork. Label with date; store in a cool, dark place. Refrigerate after opening.
👉🏽 Looking for a fun way to use your homemade jam? Try swirling it into our PB&J Ice Cream Recipe for a nostalgic twist on a childhood classic.
❄️ No Ice Cream Maker? No Problem!
👉🏽 Note: You can still make any of our ice cream or frozen yoghurt recipes without a machine.
Simply pour your mixture into a freezer-safe container and place it in the freezer. Every 30 minutes, stir the mixture vigorously with a fork (or hand mixer) to break up ice crystals. Repeat this process for 3–4 hours, or until the ice cream is firm and creamy.
Want more detail? Check out our full guide 👉🏽 How to Make Homemade Ice Cream Without an Ice Cream Maker
Phew, 2kg of Freshly Picked Blackberries All Used Up!
Phew! What a berry-licious marathon it’s been!
From heading out to pick those plump, sun-ripened blackberries to crafting them into a range of textures and delicious flavours.
Blackberry Ice cream, Sorbet, Frozen Yoghurt, and lastly a delicious flavour-packed homemade jam – it’s been a fruity adventure for sure!
So, whether you’re spreading this homemade jam on your morning toast or savouring the sweet rewards of your berry-picking adventure in various frozen forms, one thing’s for sure: it’s a journey worth taking, one juicy bite at a time!
Nature has given us these incredible gifts, in some cases right on our doorsteps. We hope you are now armed with a few ideas of what you can do with the Blackberries that you pick.
🫐 Turn Your Forage into Four Winners
Got a bramble haul to use up? Try our Blackberry Ripple Ice Cream, Sorbet, Frozen Yoghurt, and Jam—all mapped to a 2 kg pick so nothing goes to waste.
👉🏽 Your turn: Which one is going first? Share your pics and tips in the comments, or tag us on Instagram/Pinterest—your scoop could inspire our next recipe!
The Final Scoop
From one basket to four beautiful makes—ice cream, sorbet, froyo, and jam—your 2 kg haul stretches surprisingly far. Prep a few now, stash some for later, and you’ll be tasting summer long after the brambles fade.
👉🏽 Which blackberry recipe will you try first—rippled scoops, ultra-smooth sorbet, tangy froyo, or a pantry-perfect jam?
We hope that you’ve enjoyed our article – How to Use 2kg of Freshly Picked Blackberries – and that we’ve inspired you to turn your own berry haul into ice cream, sorbet, frozen yoghurt, or even jam.
If you have any questions, please drop us a comment below and we’ll be more than happy to get back to you.
Stay connected for more homemade ice cream inspiration! Share your blackberry creations with us on social media and join a growing community of ice cream enthusiasts. You’ll find mouthwatering recipes, expert tips, and exclusive updates across all our channels.
Follow us on Pinterest, Instagram, Facebook, and X by clicking on any of the social media icons below.
Disclosure: This post contains affiliate links. If you click on these links and make a purchase, we may earn a small commission at no additional cost to you. This helps support our website and allows us to continue creating content. Thank you for your support!

















hey Cherie,
thanks for hte article, it was very informative and i’m amazed at all the things you can do with blackberries. i’ve never picked blackberries myself, but your article makes me want to give it a try. the homemade blackberry ice cream sounds delicious, and i’m definitely gonna try making it soon. also, that blackberry jam at the end sounds like a great idea 🙂
Hey Matias,
Thanks for dropping by again.
There’s so much that you can do with Blackberries and if you haven’t tried it before, its definitely something you want to try.
Glad that you appreciated the Blackberry Ice Cream recipe and the Jam too. We love them both and the Froyo and sorbet too. All based on Blackberries, but all offer their own unique layers.
Would love to hear how you get on when you try these recipes out yourself.
Cheers
Cherie :o)